Setting up a POP email account with SSL in ThunderBird
This tutorial will show you the steps for setting up a POP email account with SSL in ThunderBird
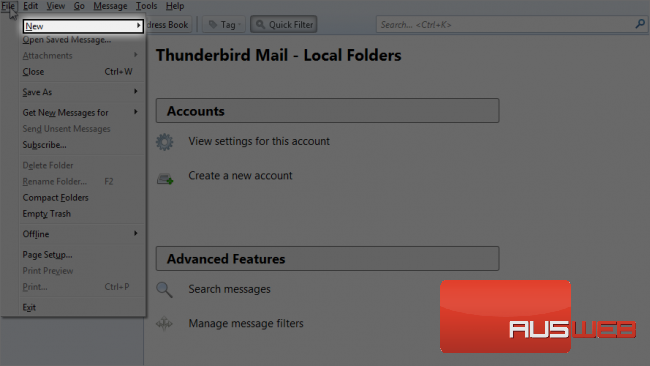
1) Let’s learn how to setup a pop email account with SSL in ThunderBird. Click on the file menu to continue.
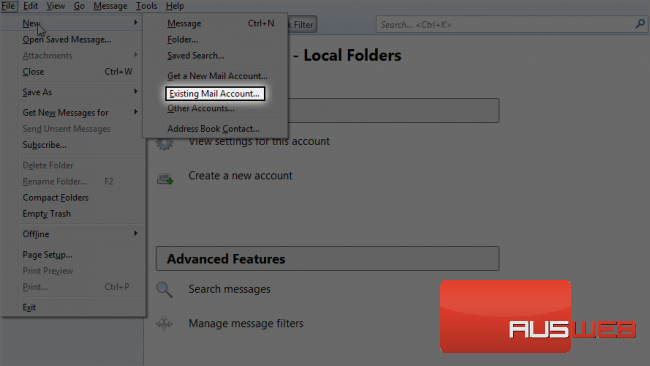
2) Click on New.
3) Please click Existing Mail Account.
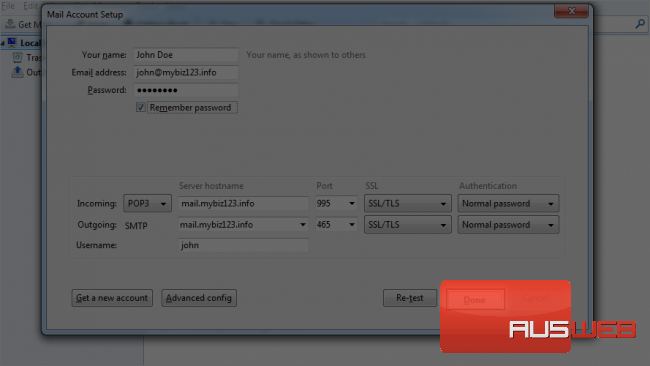
4) Type your name.
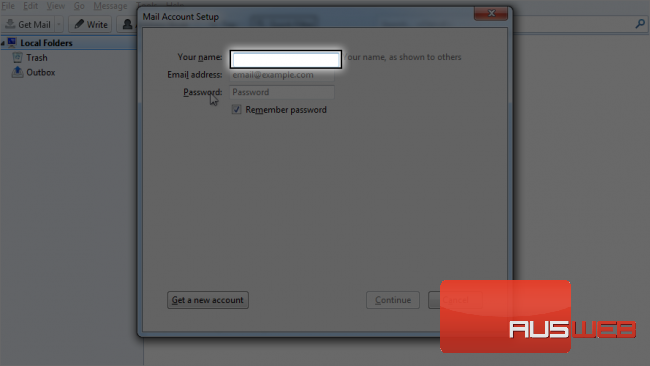
5) Type your email address.
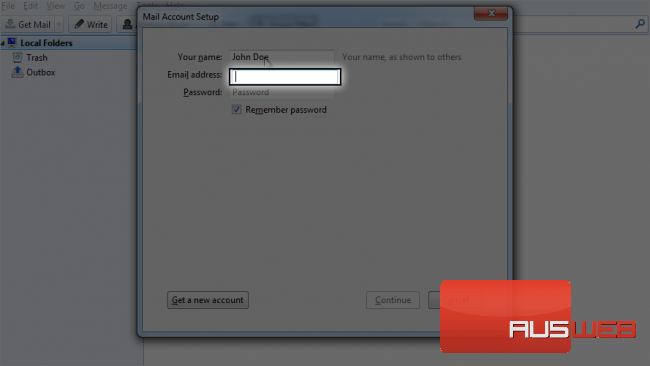
6) Select this option if you want to remember your password.
7) Type your password.
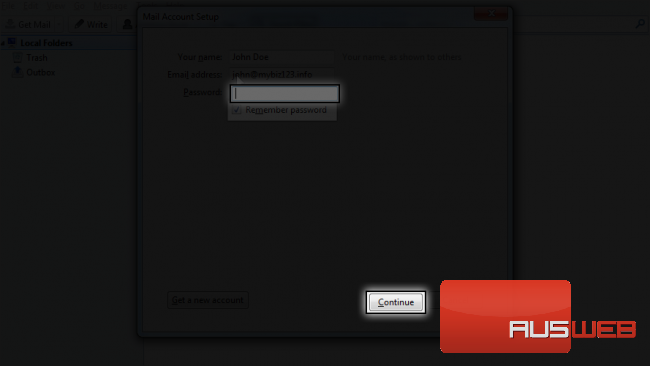
8) Click on continue.
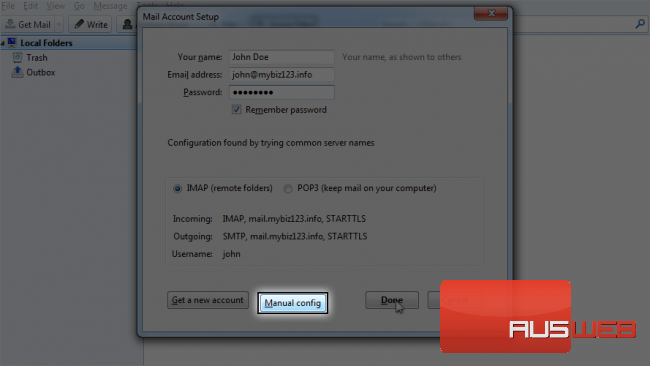
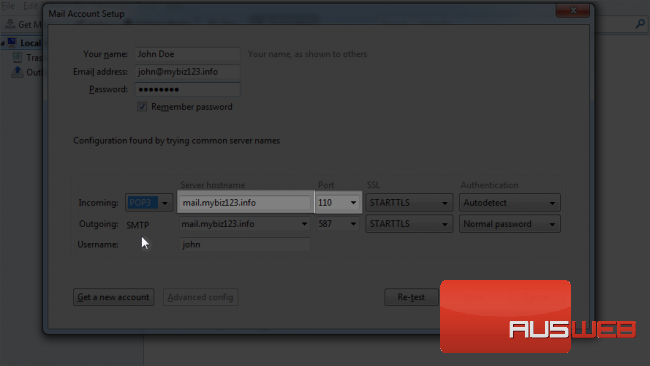
It will fill in these settings automatically, but let’s choose manual config to choose the settings manually.
9) Click on Manual config.
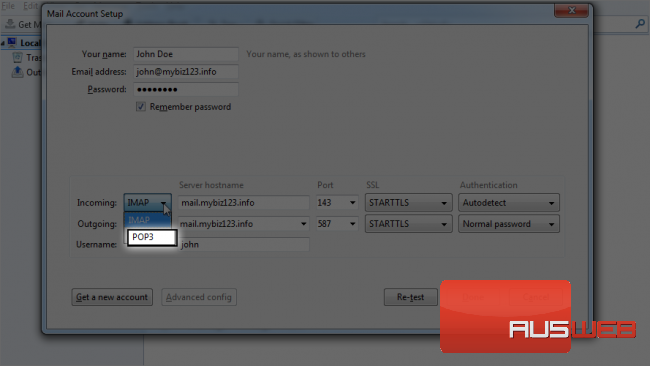
10) Click here to select POP3 protocol.
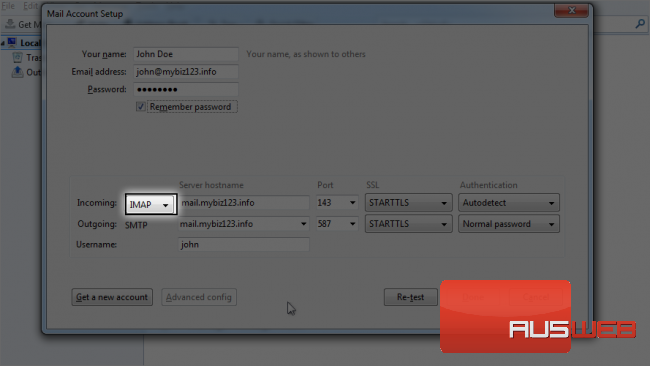
11) Select POP3.
12) Under server hostname make sure it says mail.yourdomain.com or whatever hostname your web host supports.
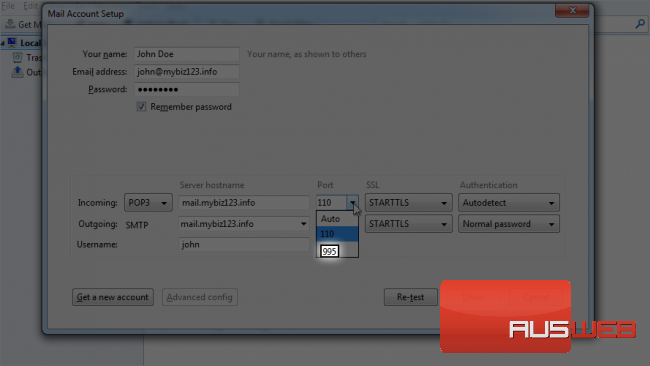
The SSL Port for POP3 should be 995. Let’s change it.
13) Click on 995 to select it.
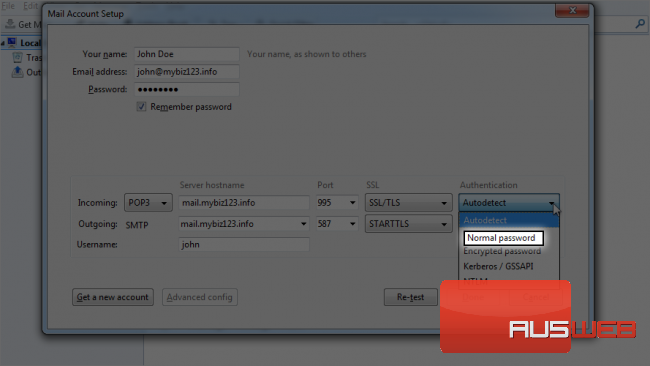
Notice SSL/TLS is automatically selected as we have choosen 995 for the port.
14) Authentication should be set to normal password. Let’s select it from the list.

15) Select Normal password.
16) SMTP will be selected by default. Make sure the server hostname is mail.yourdomain.com.
SSL SMTP port should be 465. Let’s change it.
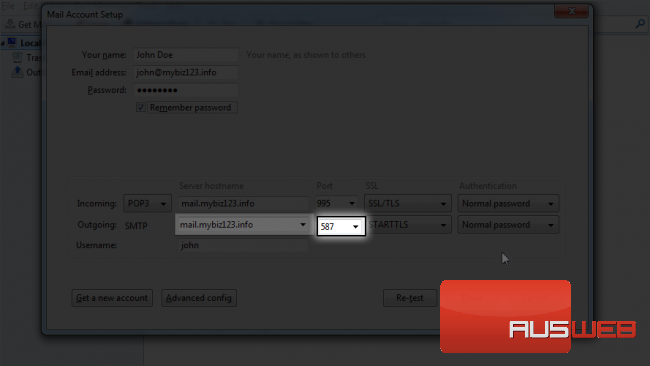
17) Select 465 from the list.
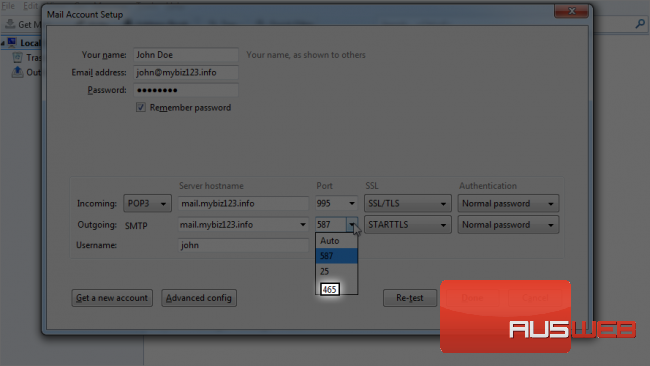
Again, because we changed the port, SSL has been changed to SSL/TLS. Leave it as it is.
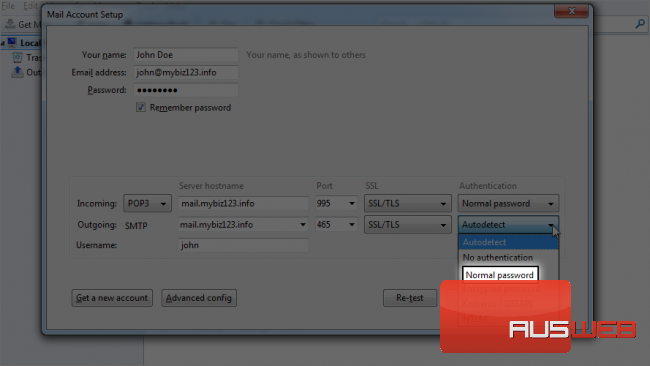
Authentication has been changed to autodetect. Let’s change it to a normal password.
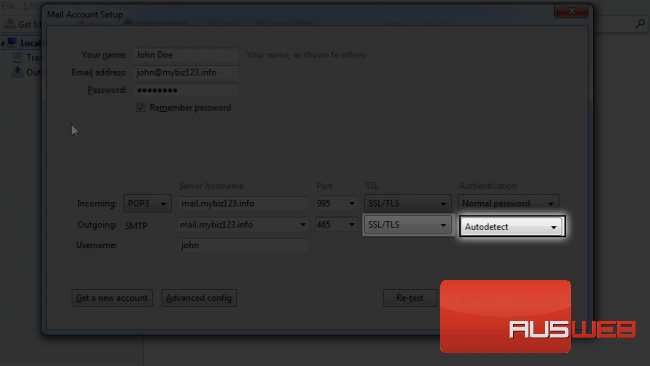
18) Select Normal password.
19) Click on done to finish the setup.
Here is your newly created account!
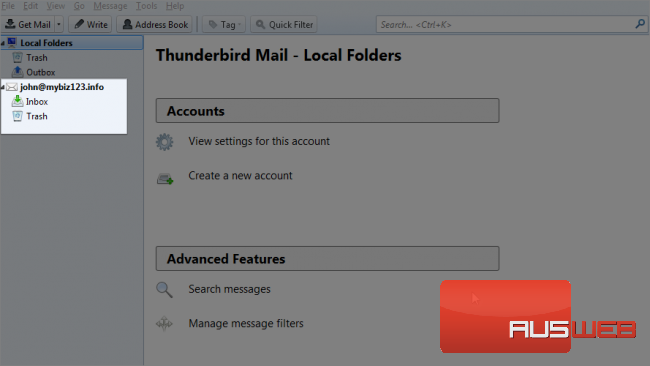
This is the end of the tutorial. Now you know how to configure a pop email account with SSL in ThunderBird.
