Setting up a POP email account with SSL in DreamMail
This tutorial will show you the steps for setting up a POP email account with SSL in DreamMail
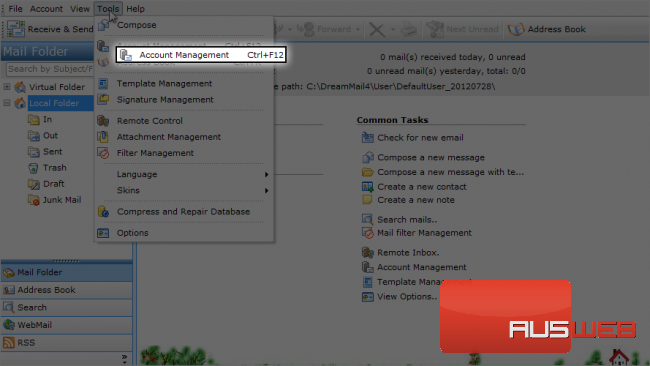
1) Now please click on the tools menu.
2) Please click Account Management.
3) Please click on New.

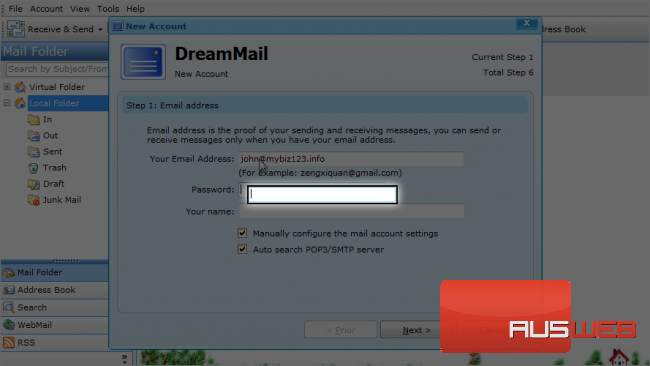
4) Type your email address.
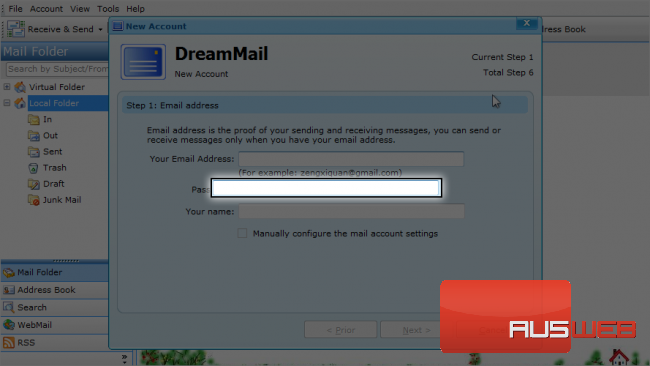
5) Please type your password.
Leave these options selected.
6) Type your name.
By selecting this option, you will be able to manually configure the email account settings.
This is a very useful option. If you select this, DreamMail will enter the mail server settings automatically if they are available.
7) Leaving both selected, click next to continue.
8) Type your name which will be displayed in the Sender column to the receiver.
9) Click on Next to continue…

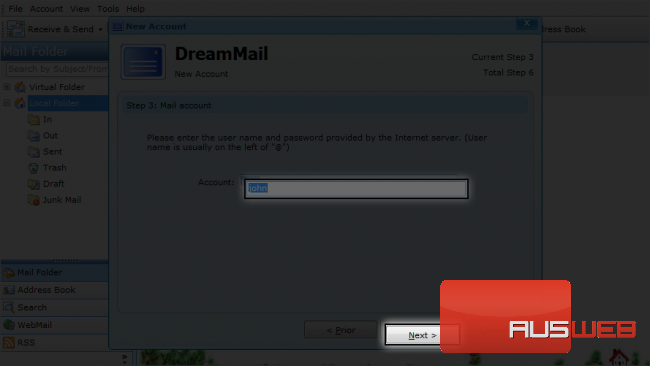
10) Enter your username which should be your full email address, for example, [email protected]
11) Click Next to continue…
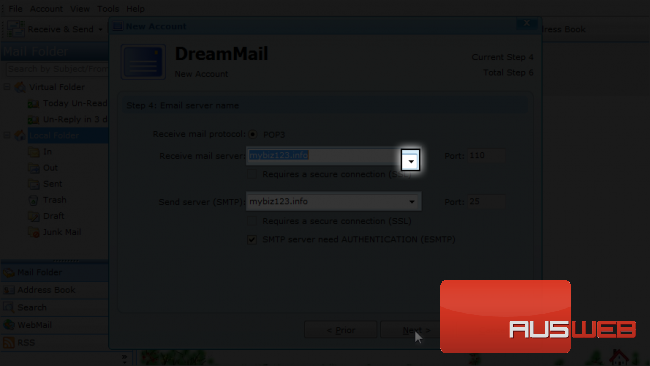
Note that the server info is already populated as we selected the auto search option earlier.
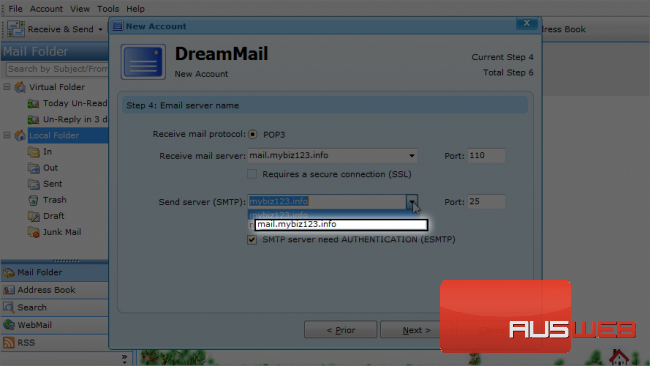
The mail servers listed here are domain.tld which may work, but for cPanel servers mail.domain.tld is the recommanded server name.
12) Lets change them. Click here to change…
13) Select mail.mybiz123.info.
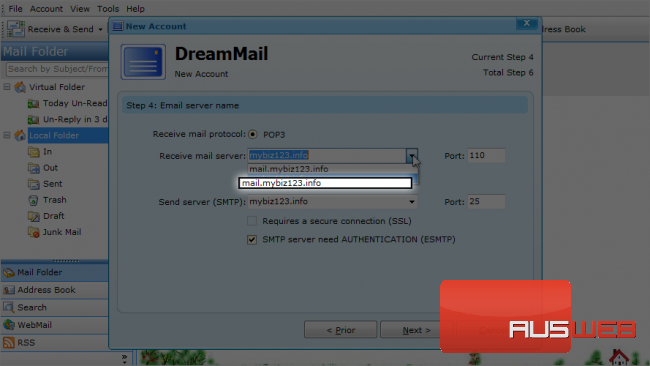
Let’s change the outgoing server to the same: mail.mybiz123.info.
14) Click here to continue…
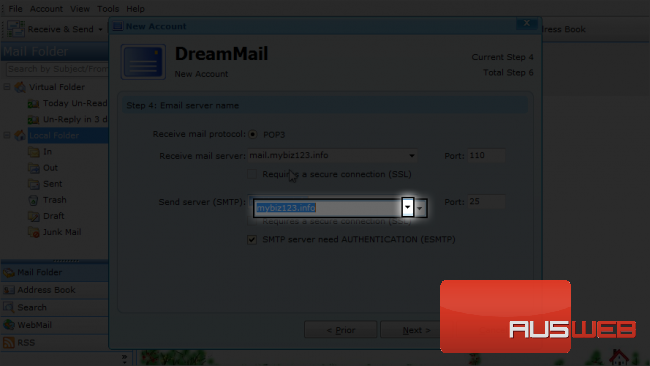
15) Select mail.mybiz123.info.
If your server needs SMTP server authentication, then keep this selected; otherwise, deselect it. Let’s leave it selected for now.
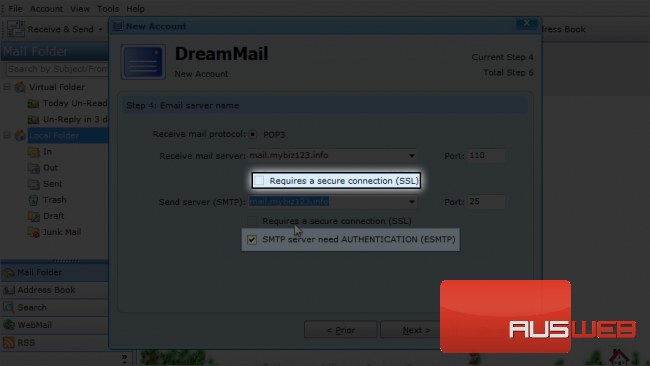
16) Now select Requires a secure connection (SSL) for the incoming mail server.

Note that the POP port has been changed to 995. You need an SSL port for a POP server.
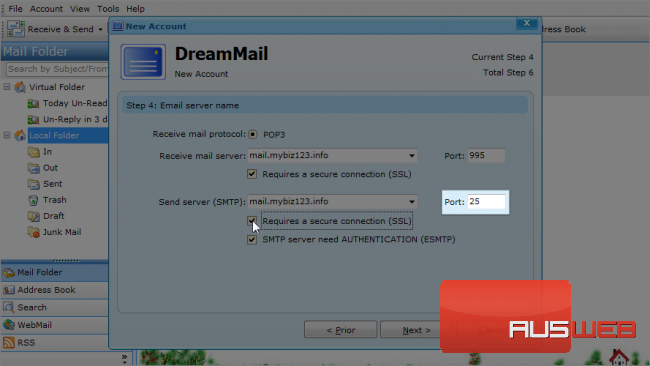
17) Now select this option for the SMTP server.
The port hasn’t been changed for the SMTP server automatically like it was for POP3.
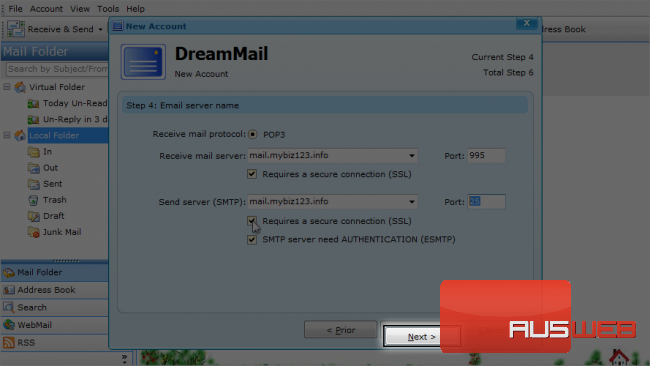
18) Make sure you change it to 465.
19) Now click on Next to continue…
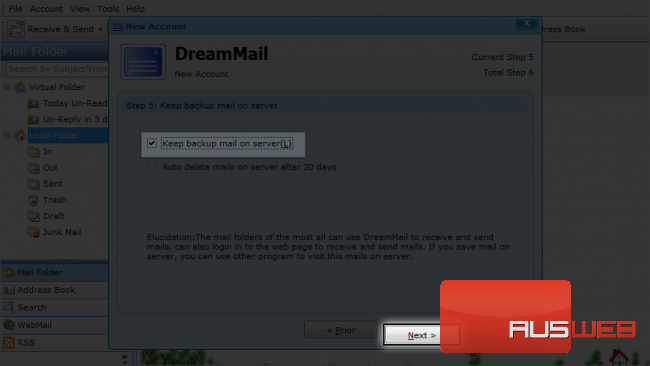
Leave this selected so your mail will be left on the server despite it being downloaded in DreamMail.
20) Click on Next to continue…
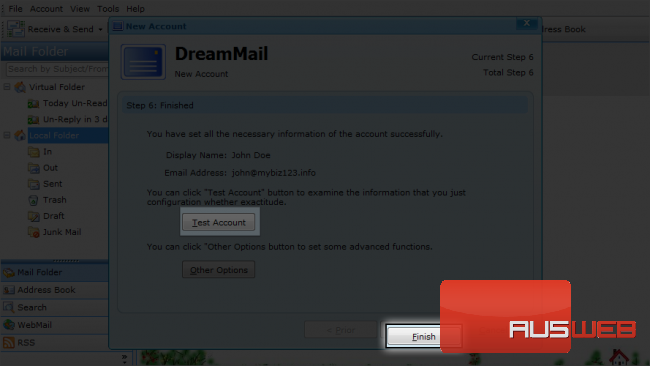
Almost done! You can click on Test Account to verify the info you entered.
21) Let’s just hit Finish to continue…
This is the end of the tutorial. Now you know how to configure a POP email account with SSL in DreamMail.
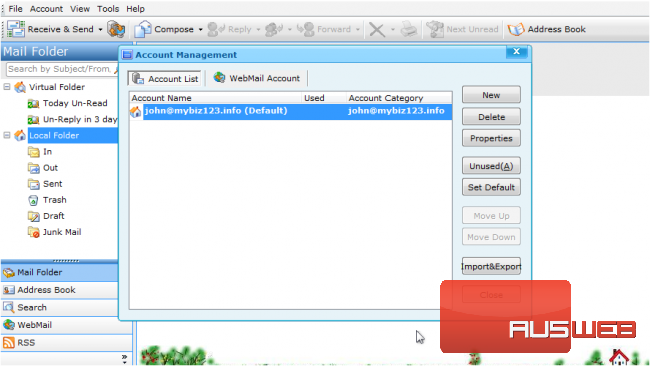
You have successfully configured a POP email account in DreamMail.
