Point MX Records to Google Mail Servers
The following document describes how to add MX records if you are hosting your e-mail with Google.
You can find the Google MX records using the following link:https://support.google.com/a/answer/174125?hl=en
The current MX records are as follows:
| Server | Priority |
| ASPMX.L.GOOGLE.COM. | 1 |
| ALT1.ASPMX.L.GOOGLE.COM. | 5 |
| ALT2.ASPMX.L.GOOGLE.COM. | 5 |
| ALT3.ASPMX.L.GOOGLE.COM. | 10 |
| ALT4.ASPMX.L.GOOGLE.COM. | 10 |
Note: This article is based on the assumption that you have a Google Apps account where all mailboxes are already created.
Note: It may take 24-48 hours for the DNS record changes to propagate.
Cpanel:
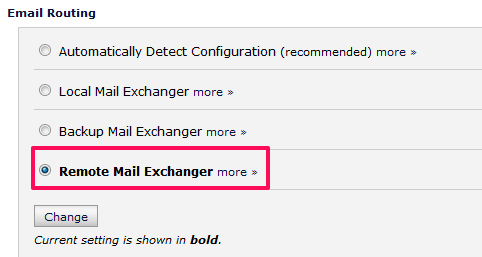
- Log into cPanel for the account you wish to make the changes to. Click theMX Entry link from the email section.
- Select Remote Mail Exchanger in the Email Routing section.Click onChange.
- In the Add New Record section, enter the first MX record and click on Add New Record button.
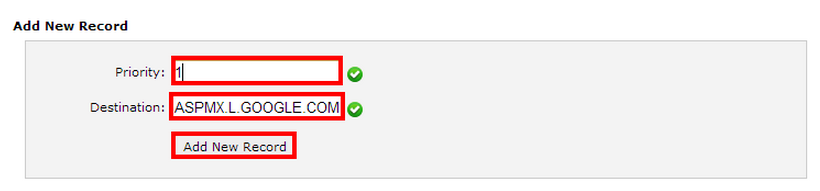
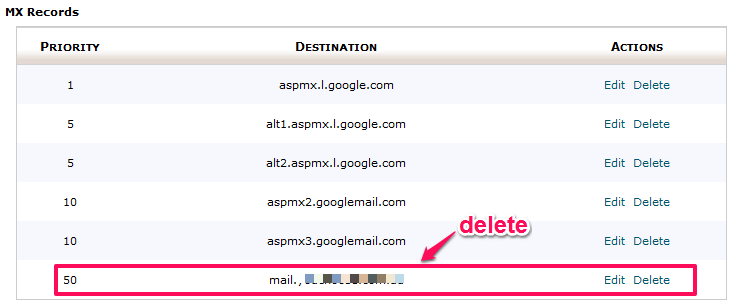
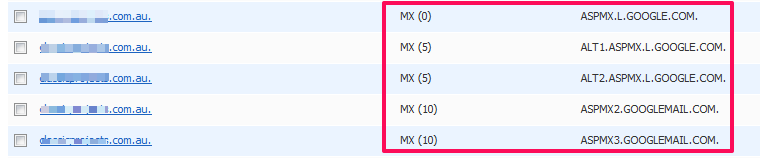
4. Similarly, add all 5 MX records. Once added, the records should reflect the Google records as shown below.
Note: If you find any other MX record apart from Google records, delete it by click on the Delete link.
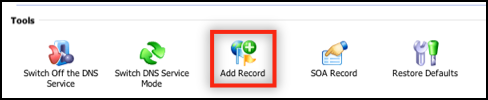
Plesk Panel:
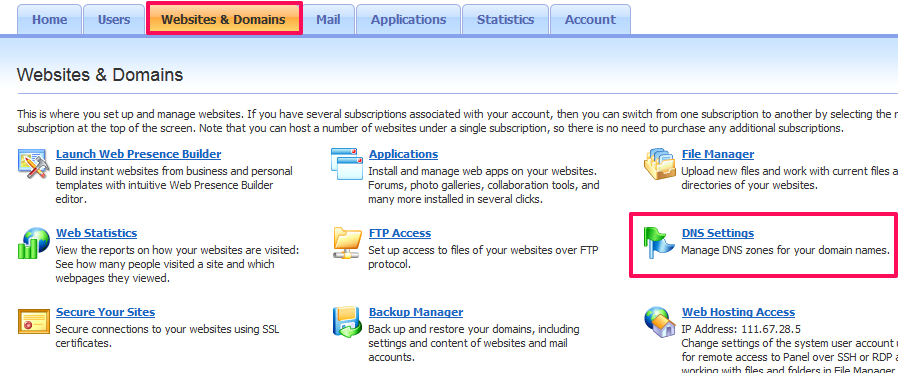
- Log into your Parallels Plesk Panel account.
- Go to Websites & Domains > DNS settings
- Click on Add Record.
- Add the MX records as shown below:
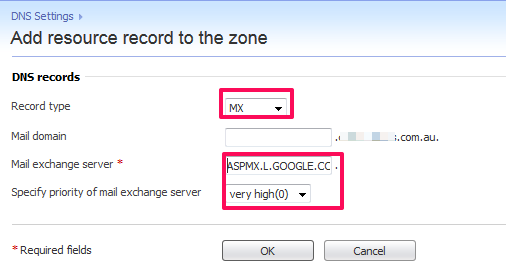
Note: If the priority dropdown menu doesn’t have exact priority as provided by Google, use the closest priority. E.g. the dropdown menu does not have priority 1 – so you can use priority 0 instead.
- You will see a confirmation message; click on the Update button to confirm the DNS modification.

- Once all the records are added, the records should match with the records provided by Google.
Note: If you find any other MX record apart from Google Apps records, remove it.
