Enabling SpamAssassin, SPF and DKIM in cPanel
This tutorial will show you the steps for enabling SpamAssassin in cPanel
Email spam is a very frustrating reality of the online world we live in. Many tools have been developed along the way to try and combat this probelm including both server and desktop solutions. This tutorial will guide you through enabling Spam Assassin on your hosting account using your cPanel.
Spam Assassin is a very effective antipsam tool and it is offered with all of AUSWEB cPanel hosting plans. By default Spam Assassin is disabled in your cPanel but it is a relatively simple procedure to activate it. The key is configuring it to offer you extra protection whilst producing as few false positives as possible.
Enabling Spam Assassin
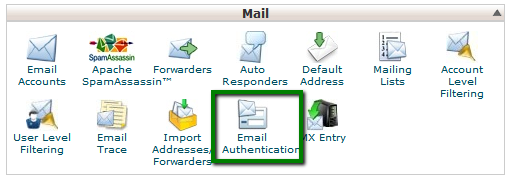
Once logged into your cPanel you will see Spam Assassin located under the Mail tab.
Clicking on the link will take you to the main configuration page where you will see a variety of options. To get started, simply select the “Enable Spam Assassin” button. This will turn Spam Assassin on using its default settings.
Filters
The default filter level is set to 5 which is good for most end users. A higher number will result in less spam getting tagged and reduces false positives. You can always change this number down the track if you find you get a high level of false positives.
e.g.
Low threshhold = 5 (default)
Medium threshold = 7.5 (slightly less spam caught but fewer false positives)
High threshold = 10 (much less spam caught but least likely to produce false positives)
You can also select to automatically delete spam as soon as it arrives. This can be helpful in keeping things easy to manage but is generally only recommended if you can deal with occasionally losing legitimate emails. Again, you need to be very careful with the settings you apply to reduce the chance of false positives.
Spam Box
When you first enable Spam Assassin it will simply tag emails as spam by putting ***SPAM*** in front of the subject(unless you have enabled “Auto-Delete Spam”). This setting allows you to then configure your email client to filter these message based on the tag. Enabling the Spam Box means that rather than emails just being tagged they are actualy moved to special folder on the server, therefore not actually getting to your desktop inbox. This folder is automatically created when the first spam message is caught.
The upside to enabling the Spam Box is that you avoid having to download unccessary junk, yet you can easily login to your webmail account to see if a message has ended up there by mistake. The downside to filtering with this method is that you then need to frequently login to cPanel to empty the Spam Box, otherwise it will use up your valuable disk space.
Configure Spam Assassin
This section provides you with a few advanced settings that can assist in either blocking or allowing mail based on a prtucluar address or an entire domain. For exmaple, if you were constantly losing emails from one company you could add their domain to the Whitelist, therefore telling Spamm Assassin that it is legitimate and to let it through. You can also do the exact opposite by blocking addresses using the Blacklist. Both the Blaicklist and Whitelist work in the same way and can accept wild cards * and ?; e.g. *@isp.com or *.domain.com.
To add a name to either list just put it in the appropriate box and hit save.
Additional SPAM trouble shooting
Additional tips and suggestions to help protect yourself against spam.
Protect your email address
Never display your email address on public forums or websites. Spam bots crawl and scan random website pages for email addresses. These bots harvest the email addresses they find and use them for spam mailing lists.
Always use and online contact form on your website rather than display your email address on your site.
Always use a CAPTCHA
Make sure to use a CAPTCHA to protect your online form.
Use a secure password
Insecure simple passwords are a common issue with email spam, always use a secure password with at least 8 digits including upper and lower case letters and numbers.
Disable Catch-all email address
A catch–all email account is an address that is specified to receive all messages that are addressed to an incorrect email address for a domain.
Always disable catch–all email addresses to avoid any mayor SPAM
cPanel Email Authentication Tool – SPF Records and DKIM Records
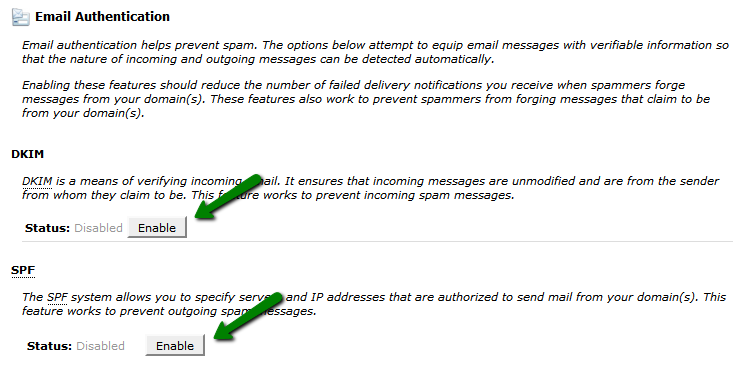
Email Authentication is an effective set of anti-spoofing and anti-spamming tools available in cPanel.
It consists of two major components – SPF and DKIM records setup.
Click on Enable and the records will be added to the DNS zone of *all* hosted domains automatically
NOTE: you may see the following warning about authoritative nameservers right after enabling
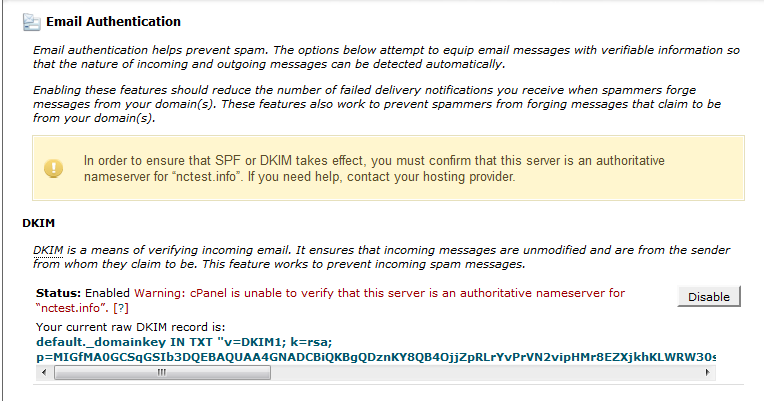
Allow some time to pass for the records to propagate and refresh the page afterwards.
The warnings should go away and DNS checks will be passed
Nowadays the vast majority of spam emails have fake data in the «From» field. Spammers and fraudsters use special tools to send their mail on behalf of a real owner of the e-mail address.
SPF record (acronym for Sender Policy Framework) is an effective and simple method which lets you avoid such issues. If your domain name has correct SPF record then you can be sure nobody is able to send fake e-mails on behalf of your domain name.
The main idea of SPF record is that an owner of domain name publishes the information about IP addresses that are authorized to send mail from this domain name. The receiving server compares the information in the envelope sender address with the information published by domain name owner. If these details match then e-mail is delivered.
NOTE 1: sometimes cPanel automatically fetches incorrect server outgoing IP address. This happens when we have to change outgoing mail IP due to poor mail reputation or blacklists.
NOTE 2: SPF record has its own specific syntax. It is strongly recommended to get familiar with SPF record syntax documentation if you are going to customize the record manually.
NOTE 3: SPF record is added to your domain DNS zone as TXT record. There are cases when you need to add another TXT record to verify your domain name ownership for some service. It is *not recommended* to modify existing SPF record, it is better to add a new one instead.
DKIM (DomainKeys Identified Mail) is another way of e-mail authentication. This method uses information about domain which is published by the domain owner. That information allows receiving server to verify if the e-mail message was sent by legal owner of that domain name.
Once TXT record which contains DKIM has been added to DNS zone a special code is added to the headers of outgoing e-mails. Receiving servers compare these headers with the information in DNS zone and if it matches then the e-mail is delivered.
NOTE: DomainKeys(DK) and DomainKeys Identified Mail (DKIM) are separate things.
DomainKeys(DK) are not available on our shared servers as DK implementation was converted to DKIM and extended in a number of ways as of Cpanel 11.32 and later releases.
Some of the differences between DomainKeys and DKIM include:
– Multiple signature algorithms (as opposed to just one available with DomainKeys)
– More options with regard to canonicalization, that validates both header and body
– The ability to delegate signing to third parties
– The ability for DKIM to self-sign the DKIM-Signature header field – to protect against its being modified
– The ability for wildcard option on some parameters
– The ability to support signature timeouts in DNS
If having DomainKeys for you is a must, we suggest upgrading to VPS/Dedicated server where you will be able to setup this feature.
These simple actions will let you be sure that no one is able to send spam on your behalf and your e-mail will not be delivered to spam folders.
