How to create a log file of your Putty session
PuTTY Enhanced series
6. How to create a log file of your Putty session
This tutorial assumes you have already downloaded PuTTY and located its .exe
1) Double click the PuTTY icon to launch the application

Now let’s learn how to create a log file of your session
2) Click Logging

The logging settings are listed here on the right. Let’s demonstrate how to save a log file to your desktop
3) Click All session output
4) Leave Putty.log as the log file name
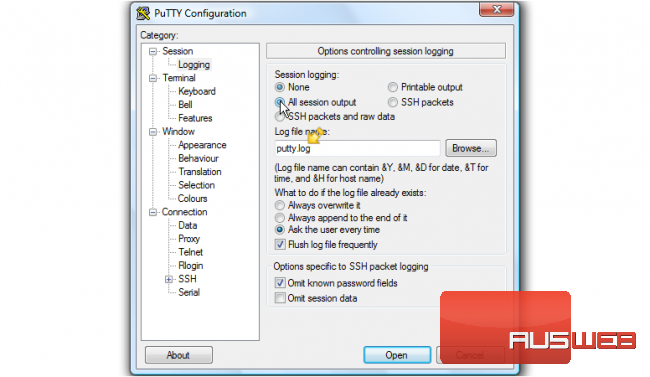
5) Then click Browse to choose the save location
6) Ensure Desktop is selected here…
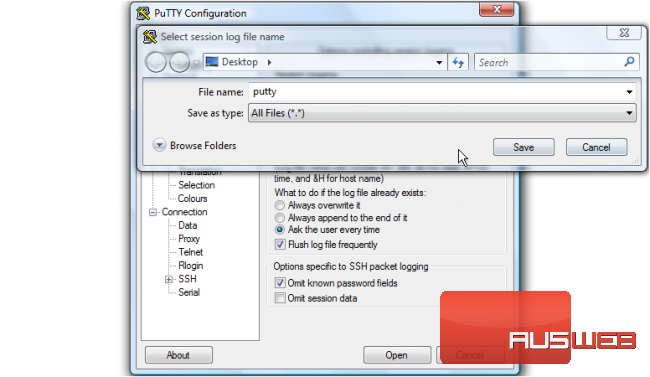
7) Then click Save
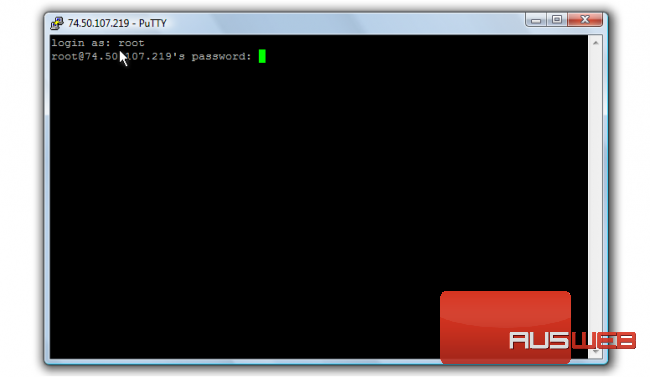
8) Ensure ‘Ask the user every time‘ is selected… then click Open to begin your session

9) Type your username, then push <Enter>

10) Type your password, then push <Enter>
Now let’s type a simple shell command. PuTTY can log dozens of commands within your session
11) Type a simple test command here, then press <Enter>
12) Now type Exit, then push <Enter> to close PuTTY
We can see that a log file has been saved to the desktop
13) Now let’s open the log file… double click Putty
The log file contains all commands entered, great for saving your sessions to review at a later date
This is the end of the tutorial. You now know how to create a log file of your PuTTY sessions
