Create a cPanel account in WHM
This tutorial will show you how to create a cPanel account in WHM
This demo assumes you’ve already logged in to WebHost Manager (WHM). Now let’s learn how to create a new hosting account.
1) Click the Account Functions link
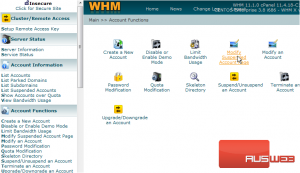
2) Then click the Create a New Account link
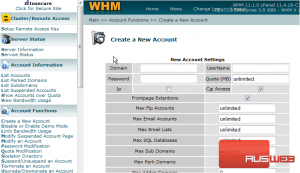
This is the heart of WHM. It is the screen where you can create new hosting accounts in real time
There are several options for which you get to set limits for. The limits you set here will define how many resources the account has access to. Let’s go ahead and create a new hosting account
3) Enter the domain name that will be used for this new account

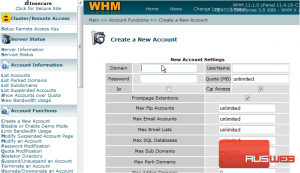
4) Now enter a password for the account, after which a username will be created automatically which you can edit later

At this point we can continue to fill in values for all the options, or to speed up the process, we can choose a pre-defined account package, to automatically fill in many of the options
5) Open the Package drop down menu
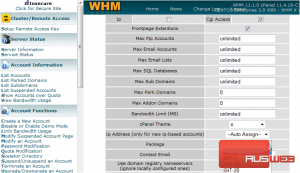
6) Let’s go ahead and choose the abc123_bronze package

Notice how the Quota, Max FTP accounts, Max Email Accounts, and all other options on this page have just been filled in. This has been done in accordance with the definition of the Bronze package, which you can setup in the Account Packages section of WHM

You can setup as many packages as you want, and you should, as it helps speed up the process of creating hosting accounts
Even though this package predefined the quotas for the account, you can edit any of these options futher. Let’s edit the Max SQL Databases quota

7) Click Create

That’s it! The hosting account has been created on the server, and a new cPanel control panel has been setup for it
8) You should now send this information to the person who will be using the account. They will need to know the username, password, and IP address, as well as the nameservers

They can now login to cPanel for this new account (using the username and password we assigned), but will have to use the IP address method rather than the domain name method, since the domain name will not work until it’s nameservers have been changed and propagates (more on this in the cPanel tutorials)
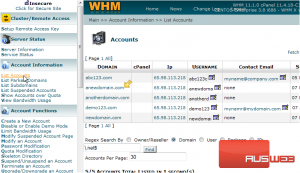
OK, let’s go take a look at the accounts in our reseller plan
9) Click the List Accounts link
There it is, the new account we just created
This is the end of the tutorial. If you ever want to make changes to accounts you create, you can do so be returning to WHM and using the Modify an Account feature
