Change RDP port on a Windows Server
Windows servers are remotely accessible with Remote Desktop via the TCP 3389 port (default port). In some situations, when a more secure environment is needed, changing the remote access port can be useful. This article explains how to change the RDP port on a Windows Hosting Server.
Note: Make sure you have opened remote access to the new RDP port in Windows Firewall before starting to avoid locking yourself out of the server.
WARNING: Be careful when making changes to the Windows Registry as it contains critical configuration settings for your operating system.
The instructions below apply to machines running Windows Server 2012, 2008 R2, 2008, and 2003. Please follow the below steps to change the RDP port:
- 1. Connect to the server via Remote Desktop
- 2. Click simultaneously on the Windows logo + R to open the “Run” dialog
- 3. Open the registry editor by typing the “regedit” command
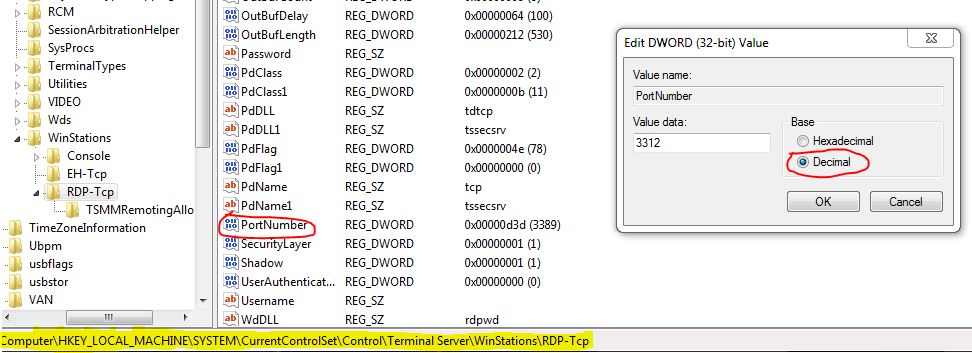
- 4. Search for this registry subkey: HKEY_LOCAL_MACHINE\System\CurrentControlSet\Control\TerminalServer\WinStations\RDP-Tcp\PortNumber
- 5. Double-click or right-click on the “PortNumber” registry subkey, select the decimal base and type the port number of your choice (the default port is 3389, in this example, the selected port is 3312). Click on “OK” to save the selection.
IMPORTANT: Make sure that remote access to your server through the new port is authorized in your Windows firewall before executing the next step.
- 6. Exit the registry editor
- 7. Restart your server
After the reboot, specify the Remote Desktop port number. Learn more about our Windows VPS hosting here.
